Showing posts with label Chicken. Show all posts

Tuesday, January 19, 2010

#4: Roast Cabbage? Really? Yes, really.

As I was waiting for scripts to run so I could debug them, I started catching up on several weeks backlog of The Kitchn. A couple of weeks back, as a "Easy Winter Recipe", they posted Roast Cabbage with Bacon. As it happens, I've been trying to figure out something to do with the other half head of cabbage leftover from my pot stickers. I don't happen to have any bacon on hand, but after reading the whole article and following a few links, I decided to try just roasting it with a little olive oil and salt as part of a larger dinner.

I pondered what that dinner might be as I drove home, and realized that if I have my oven hot and a pan only half filled with cabbage, I should really make use of the other half of that pan. Roasted potatoes! And now that I have my starch covered, what for the protein? Mentally walking through my freezer, I remembered some chicken breasts that have been around for a bit and needed to be cooked before they got freezer burn.

So once I got home, I defrosted the chicken, whipped up an asian-style marinade, and put together a pretty darn tasty dinner.

Asian Style Chicken and Leeks
1 full chicken breast
2 leeks
2 tbsp sesame oil
2 tbsp soy sauce
2 tsp Worcestershire sauce
1/2 cup water
1 tsp powdered garlic
1 tsp powdered ginger


Cut the chicken into bite sized pieces. Cut the roots and dark leaves off of the leeks and discard; cut the leeks into thin rings. Mix the remaining ingredients into a marinade and pour over the chicken. Set aside for 30-45 minutes, stirring occasionally. Heat a wok over high heat. Add 1-2 tsp of sesame oil and cook the leeks for 3-4 minutes. Add the chicken and marinade and cook until the chicken is done. Serve over roasted cabbage.

Roasted Cabbage

Quarter a head of cabbage and remove the core. cut the quarters into two or three sections each(1), drizzle with olive oil and sprinkle with salt. Roast at 450° for 30 minutes, turning once halfway through.

Roasted Potatoes

Cut 2-3 potatoes into pieces 1 to 2 inches across. Drizzle with olive oil and sprinkle with kosher salt and garlic flakes. Roast at 450° for 30 minutes, turning once halfway through.


____________________________________

(1) The more you cut the cabbage, the more "edge" you create, which will burn slightly, giving the cabbage a smoky flavor. If you like that flavor (as Dorothy does), cut it more; if not, cut it somewhat less.

Sunday, October 18, 2009

Come on down to Tony's Diner!

We're cooking up burgers today! Not just any burgers, but good old fashioned roadhouse "sliders" on fresh baked potato rolls!

To start with, we need the rolls. Good bread takes time, but even so this recipe isn't all that intensive. Mostly it just needs time to rise:

1 pkg (1/4 oz) yeast
1 1/2 cup warm potato water(1)
1/3 cup butter, softened
1/4 cup sugar
1 tsp salt
1 cup potatoes, mashed(2)

4-5 cups all purpose flour

In the bowl of your stand mixer, proof the yeast in 1/2 cup of the potato water with 1 tbsp of the sugar. Once the yeast is foamy, add the remaining water, sugar, salt, and butter, and beat until well mixed. Add the potatoes and continue mixing for 2-3 minutes. Add the flour 1/2 cup at a time, allowing each addition to fully incorporate before adding the next. At around 3 or 3 1/2 cups, the dough will be thick enough to switch to a dough hook if you have one. Continue adding 1/2 cup of flour at a time until the dough is pulling away from the bowl. Depending on the humidity, this should be at about 4 or 4 1/2 cups.

Turn the dough out onto a lightly floured surface and knead by hand until you have a smooth, satiny dough. You may have to add up to another 1/2 cup of flour. Once it is smooth, form into a ball and place into a buttered bowl. Cover and refrigerate for at least 2 hours or up to 24 hours.(3)

When you are ready to continue, take the dough out and punch it down, then let it rest for 10 minutes. Prepare a 9 x 13 baking dish with baking spray or butter.

To prepare the rolls, place the dough onto a cutting board. Use a sharp knife to cut the dough into equal sized portions and arrange those portions into your baking dish.(4) Place in a warm place to rise until doubled in bulk.(5)

Bake at 400° for 16-20 minutes until golden brown.


Once these babies are in the oven, we start preparing the meat. We're doing regular hamburgers as well as grilled chicken, portioned out to fit nicely on the rolls.

Following Alton Brown's instructions from his "Man Food Show" episode, we roll a pound of ground chuck out nice and thin (using a sheet pan, or just eyeballing the size and shape). We sprinkle the top with kosher salt, fresh ground pepper, and onion and garlic powder, then fold the meat over longways, pat it together, and cut into eight squares with a pizza cutter. Finally we put them on a 350° griddle for 3-4 minutes on a side.

For the grilled chicken burgers, we take a split chicken breast and cut each side into three pieces. The thicker portions get flattened out a bit by folding a piece of waxed paper over each piece, then hitting them with a rolling pin a few times. With a bit of olive oil on the griddle we cook them like the burgers, 4 minutes on a side at 350°.

Each burger is served with a bit of your favorite sauce (mayo is mine), some grilled onions, and a slice of cheese. They're small but packed with flavor! Come on down and order yours now!

__________________

(1) This is the water you cooked the potatoes in.  Since I do a lot of potato bread, I'll boil up five or six potatoes at a time, then portion both the potatoes and the water into baggies (1 cup of potato or water in each) and freeze them so I can get out just as much as I need at baking time.

(2) Don't add any salt or butter. This isn't a side dish, it's an ingredient.

(3) Potato bread is a wondrous thing. It does its first rise in the refrigerator, and you can let this go until the next day, allowing you to prep the dough the day before a big dinner. The next day you just get it out, let it warm up, and pop it in the oven.

(4) For the sliders, I went with 16 fairly large rolls by cutting the dough into halves four times. You could also do 24 more dinner-roll sized rolls by cutting the dough first into thirds, then cutting those into halves three more times.

(5) If you refrigerated for the minimum 2 hours, the second rise should take 40 minutes to an hour. If you refrigerate longer, the rise will take longer as the dough has to warm up, so allow enough time and watch the volume of the rolls. I find it helps to put the oven on "warm" (about 170°) for about 5-10 minutes to create a good rising spot. I cover the pan with a towel a spritz a tiny bit of water onto the towel to keep the top of the dough moist but not wet.

Sunday, September 20, 2009

Sometimes magic sounds like tape

I have quite a collection of pots, pans, bowls, and cooking utensils. Most of the time I only need a fraction of them, though I do find times to use each one, based on size and shape.  I could do with fewer, I suppose. I could lose the smaller mixing bowls and just use the larger ones; I really only need a couple of spoons, or a single ladle. But every now and then, the stars misalign, and things don't go quite as planned. You have to press some extra equipment into duty to get the job done. Sometimes magic sounds like tape (around 4:45 here, in case you don't get the reference), and sometimes cooking sounds like muffled curses and extra pots and pans.
_____________

I have a number of cookbooks and websites I read not to actually cook the recipes, but just to kickstart my imagination.  Left to my own devices, I'll slowly work myself into a rut of cooking the same two or three things every week; when I realize I'm doing it, I start reading my cookbooks and searching sites for ideas.

One of the books I have is of the "30 minute meals" variety. It features ways to use various frozen vegetables, canned soups and sauces, and premade biscuits(1). One of these was a chicken pot pie, using leftover chicken (from a presumed prior chicken meal), canned Cream of Chicken soup, a bag of frozen mixed vegetables, and a famous layered biscuit-in-a-tube to make the crust.

Since my purpose is to cook (for fun, health, and profit(2)), I decided to make my own pot pie. Starting at the top, I realized that the only choice for a crust was Alton Brown's amazing biscuits, which I so enjoyed when I made the fruit crostada. For the filling, I had to come up with meat, veggies, and sauce. Since I don't cook a whole chicken very often, and since Dorothy doesn't care for dark meat anyway, I decided to roast and shred a chicken breast. I went with a standard mix of vegetables: potato, celery, carrot, and garlic, with some green onion mixed in, just for fun. Instead of a cream-soup based sauce, I decided to instead do a roux thickened stock.

Thus, with plan in hand, I got to work. Things started out pretty well, but as I was free-wheeling it, I made some mistakes, and had to go into Emergency Management mode. Hence my thankfulness for the extra pots and bowls. Ready to start keeping score?

I started off really well. My timing was nearly perfect. My chicken breasts were frozen from an earlier purchase(3), so I thawed them in the microwave [small dish] then put them in the oven to roast [cookie sheet with aluminum foil].  While that was going I chopped the vegetables and set them aside [cutting board, medium mixing bowl]. Then I made a roux and added some chicken broth [medium heavy pot]. Once I got that to simmering, I added the vegetables to precook and to let the starch help thicken the sauce. About that time, the chicken got done cooking, so I took it out and shredded it, set the meat aside [baking dish], and turned the oven up to 450°.

After a while, the sauce seemed to stop getting any thicker.  It wasn't quite where I had hoped it would be, but I decided to just bully on.  I went to pour the veggies and sauce into the baking dish, and discovered that it was way more volume than I had intended, so I divided the mixture into two portions [baking dish #2]. Both dishes were still nearly full to the top, leaving little room for the biscuit topping; plus, I just wasn't happy with the consistency of the sauce: it was too thin and soupy. I decided to go back and try to fix it, so I strained the sauce out of the meat and vegetable mixer [colander, reuse mixing bowl from before] and returned it to the heat [reuse heavy pot from before]. This time I cranked the heat and let it boil. I put the meat and vegetables into baking dish #1, and without the thin sauce it actually fit exactly how I had expected it to. I packed it down just a bit, and waited for the sauce. Eventually it did come together, and I poured it over the meat and vegetables, just to the top.

While the sauce was thickening, I made the biscuit dough [food processor, mixing bowl #2 and #3 (because I had to mix the wet and dry separately)]. I knew I was going to have some trouble with it, as it's a very wet dough. Dorothy suggested basically cutting biscuits and laying them across the top(4) which sounded like a great idea. Unfortunately, the dough isn't really cuttable; I gave it a good try, but then couldn't effectively lift the dough roudns. In the end, I just ended up spooning it onto the top of the dish and making a layer that way. Into the oven (finally!) it went, and 15 minutes later, it was done.

Final score: cutting board, food processor, cookie sheet, dish for microwave; three mixing bowls; two baking dishes; colander; several wooden spoons; various knives, forks, and spoons. Next time I'll be able to reduce the overall damage, I think. Planning ahead I'll be able to make more efficient use of my equipment.

Despite the issues with the sauce, ultimately I ended up with a wonderful pot pie, and I'll definitely make this again. Next time, though, I'll know to precook the vegetables, then strain them immediately and finish thickening the sauce, and reduce the overall pot and utensil count.

Chicken Pot Pie
1 whole split chicken breast
3 new potatoes, chopped small
2 carrots, chopped small
3 celery stalks, chopped small
1/2 bunch green onions, chopped
2-3 cloves garlic, crushed
2 tbsp butter
2 tbsp flour
1 quart chicken broth
1 recipe Alton Brown's biscuits
 

Bake the chicken breast in a 350° oven for 15-20 minutes, then shred and place in the bottom of a 9" baking dish. Once the chicken is out, turn the oven up to 450°.

While the chicken cooks, make a roux from the flour and butter in a heavy pot, then add the broth.  Bring to a boil and add the potatoes, carrots, celery, green onions, and garlic. Cook for 5-10 minutes until the potatoes have softened. Strain the vegetables out and stir into the chicken. Return the broth to a full boil and reduce. When the sauce is thickened sufficiently, pour over the meat and vegetables.

Prepare the biscuit dough and spoon into a layer on top of the meat and vegetables. (It is going to rise quite a bit, so don't make it too thick unless you want a LOT of bread with your meal. Use the leftover dough to make a crostata or just some extra biscuits for tomorrow's breakfast. Yum!) Bake for 15 minutes, then let cool before serving.


_____________

(1) In fact, it is filled with very specific suggestions as to which of these to use.  I suspect the publisher is related to a particular packaged foods distributor, though I haven't cared enough to actually research it.

(2) The profit is theoretical, in that cooking from fresh ingredients should be cheaper than precooked stuff. Whether that turns out to be true or not I haven't determined, but it's generally tastier and more fun.

(3) I had had plans to make chicken alfredo last week, but things happened, and I ended up having to freeze the chicken for later. Guess what? It's later!

(4) As Alton Brown himself actually did on Good Eats, though with a different (much drier) biscuit recipe.

Monday, September 7, 2009

Time for some curry

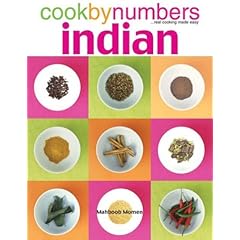
So today I was trying to decide what to make this week.  I have several leftover dishes, and we pretty much count on having zattar and feta(1) at least once a week, so I only needed one new meal. Perusing my cookbook shelf, I noticed a book I didn't recognize, pictured to the right (and available from Amazon). I have a few that I picked up at various book fairs, but I remember most of them. It's possible it was abandoned here by one of our former housemates(2); regardless, I'm glad I found it. I thumbed through it and selected a Delhi chicken curry and a sweet rice pullao.

The thing I really love about this cookbook is the organization. Indian cooking often involves spices and ingredients being added with only a couple of minutes of cook time between additions, so mise en place is critical.  This book actually lists the ingredients in the sidebar of the page listed as "Bowl 1", Bowl 2", etc., so that in the recipe itself a step can simply say "Now add bowl 2 and stir for 2 minutes." This lets you not have to think about which things go together when you're in the middle of it, and has the advantage (for me at least) of letting me do the prep, then clean everything while the pan is heating, so that only the bowls and pots have to cleaned afterward.

Delhi Chicken Curry (Delhi Murgh Tarkari)
10-12 pieces of chicken, either all thighs or half thighs, half drumsticks
1 1/4 cup chicken stock

Bowl 1: 1 large onion (sliced), 2 cloves garlic (crushed)
Bowl 2: 4 cloves, 4 cardamom pods, 1 one inch cinnamon stick, 2 two inch pieces of ginger (peeled and sliced)
Bowl 3: 1 tsp chili powder, 2 tsp coriander, 1/2 tsp turmeric, 2 tsp cumin
Bowl 4: juice of two lemons, 4 tbsp tomato paste
Bowl 5: 1 tbsp chopped cilantro leaves, 2 tsp salt, 1 tsp ground black pepper

In a heavy pan, sear the chicken in about 4 tbsp vegetable oil then set aside.  Using the same oil, cook Bowl 1 for 5 minutes or until the onions are nicely carmelized. Add Bowl 2 and cook for 2-4 minutes. Add Bowl 3 and cook for 2 minutes stirring continuously to prevent the spices from burning onto the pan. Add Bowl 4 and stir well to make a sauce, then add the chicken back and stir to coat. Add chicken stock and bring to a boil. Simmer gently for 35-50 minutes, until the chicken is tender. Stir in Bowl 5 and mix well, and let sit for 1-2 minutes to blend flavors.

Spiced Pullao Rice (Mushallar Pullao)
1 medium onion, thinly sliced
2 1/4 cup rice
1 tsp salt

Bowl 1: 1 clove garlic (thinly sliced), 10 cloves, 10 cardamom pods, 3 one inch cinnamon sticks
Bowl 2: 2/3 cup golden raisins, 1/3 cup slivered almonds

Cook the onion in vegetable oil until soft and starting to turn golden. Add Bowl 1 and cook gently for 1-2 minutes. Add the rice and mix well so that the rice is well coated with oil and spices. Add the salt and enough water to cover. Bring to a boil and simmer covered for 15-20 minutes until the water is absorbed. In a small pan cook Bowl 2 in 2 tbsp oil for 1-2 minutes, then stir into the rice.


This was the first actual curry I've ever made, and I'm impressed at how well it came out. My only complaint is that I thought it was pretty mild. On the other hand, Dorothy thought it was pretty much perfect, while  (as I expected) Alex found it too spicy for her 12 year old palate. I may up the ginger and maybe the chili just a touch next time. Also, Dorothy doesn't really care for the texture of dark meat, so next time I may try using strips of breast meat instead.

The rice had a lovely sweet and crunchy texture from the raisins and almonds, and the onion was so well combined I actually forgot it was in there. I initially served the rice and the curry separately, worried that the sweetness of the raisins wouldn't go well with the curry.  Turns out it worked really well, and we ended up just combining the rice and curry together into one dish.

___________________
(1) We discovered zattar at a Palestinian restaurant and have since discovered our local arabic restaurant/grocery serves it and sells it. We put it on pita or naan with olive oil and feta or mozzarella and heat it in the toaster oven. Yumm!

(2) And if you happen to be one of those former housemates and wish to lay claim to this book, feel free to contact me to discuss ransom terms.

Tuesday, August 25, 2009

Spicy + Sweet = Yumm!

My daughter absolutely loves chicken with Shake n Bake Honey Mustard glaze.  For her first day of Junior High, I wanted to make her one of her favorite dinners, so when I went shopping, I went to the spot with all the Shake n Bake stuff, and ... it wasn't there. So when we went shopping for school supplies at Target, I checked the grocery section, and ... it wasn't there either.

At this point, my brain kicks in. Honey mustard glaze. Clearly, this is going to consist of honey and mustard in some proportion, and probably some other spices and such.  I can do this. I just have to get an idea of what the proportion should be, and what the "other spices and such" are. To the InterTubes!

After consulting literally hundreds(1) of sites, I came to the conclusion that there really don't need to be any "other spices and such", and the proportion appears to be somewhere between 1:1 and 2:1 in favor of honey. Consensus appeared to be to use Dijon or spicy mustard, though one maverick was using plain yellow mustard. Now I can be as mavericky as the next guy, and yellow mustard does have its place(2), but I decided I'd stick with the majority.

So I heated about 1/4 cup honey in a pyrex measuring cup, then added a few squirts of mustard. After a few stirs, I tasted, and it seemed about right. Alex agreed, so I gave the chicken a soak while I preheated the oven, then baked it up.

Result: Honey mustard chicken! (I know, it's a shock!)  Put some green beans on the side, and call it dinner.
______________________
(1)  OK, about a half-dozen or so.

(2) Its place is on the door shelf in the fridge, where guests who have no functioning taste buds can use it on their sandwiches or hot dogs, saving the real stuff for the rest of us.