I absolutely love soft pretzels. Last night while reading my food blogs, I came across this recipe, and literally went straight to the kitchen to make them. The recipe is below, slightly altered to match my particular way of working.
Perfect Pretzels
1 cup milk
1 pkg (2 1/4 tsp) yeast
3 tbsp packed light brown sugar
2 tbsp butter, softened
2 1/4 cups flour
1 teaspoon fine salt
1/3 cup baking soda dissolved in 3 cups water
Additional butter for basting (2-3 tbsp)
Kosher salt or grated parmesan for topping
Warm the milk to about 110°(1) then add the yeast to proof. Once the yeast is bubbly, put it in the stand mixer and stir in the brown sugar and the first cup of flour. Once that is worked in, add the butter, and salt, then work in the remaining flour in two batches. Once the flour is all incorporated, lightly flour a work surface and turn the dough out. Knead in just enough additional flour to make the dough into a smooth, slightly sticky ball. Place into a buttered bowl and set in a warm place to rise for one hour.
Once the dough has doubled in bulk, Preheat the oven to 450°. Punch the dough down then divide it into six parts. Roll each part into a rope about 30" long, and shape into pretzel shape.
Dissolve the baking soda in the water in a wide bowl. If using salt or cheese topping, put the topping on a plate in a thin layer. Submerge each pretzel in the baking soda bath then shake off the excess. If using topping, lay the pretzel on the topping and press down to coat, then place on the baking sheet. Bake for 10-12 minutes, until they have a nice dark brown color.
While the pretzels are baking, melt another 2-3 tablespoons of butter. When the pretzels come out, baste each one with butter then set aside to cool.
We devoured the entire batch, so today I made more. They are that good.
(1) From the refrigerator, 80-90 seconds in the microwave does the trick nicely
Tuesday, December 29, 2009
Saturday, December 12, 2009
Practice makes perfect, and makes dinner, too!
Tonight I decided to throw a few things together while trying out some new techniques. First, I've been working to master the art of cheese sauce. My previous attempts have not been successes: first, my bechamel failed; then, once I had a good bechamel, once I added the cheese I got a grainy goo. Fortunately, our local Whole Foods happens to have a wonderful cheese specialist who gave me a key fact: cheddar, on its own, is not suited for sauces. It tends to clump and turn grainy even in the best base. To make a good sauce, you have to mix the cheddar with a better melting cheese. She recommended Italian fontal in an equal ratio with the cheddar. With that in mind, I got a lovely, smooth sauce. Now that I have that worked out, next I will work on different flavors with different cheese blends.
The second new technique I wanted to practice was "baked" rice. According to one site I read, cooking rice in the oven rather than the stovetop produces more predictable and better results. My theory is that the oven provides more even heating (rather than all the heat coming from the bottom of the pot). As a side bonus, the pot was easier to clean, too! I usually have at least a little rice stuck/burned on the bottom but not this time. And the rice was well cooked, just a little sticky, and full-flavored. For this batch, I added some onion and garlic, and next time I think I'll try putting some spices in as well.
As I said, this worked like a charm. The water was completely absorbed, the rice was perfect, and clean up was a breeze!
To go with my rice and cheese sauce, I decided to brown some ground beef and stir up a casserole.
Yum! We were both pretty hungry, so Dorothy and I ate the whole dish between us for dinner. As part of a larger meal (or if we had eaten more at lunch) this might have been three servings.
________________________________________
(1) Mixing the cheeses evenly is key. According to Jeaneane (Cheesemonger extraordinaire), this is the way to make sure that the clumping qualities of the cheddar are properly diluted and get a smooth sauce.
(2) Last night was burrito night; for black bean burritos I drain a 15oz can of beans and run them through my food processor with a bit of chili powder and cumin. This is every bit as good as any "refried" beans I've ever had, and doesn't have the added fat of refritos .
(3) In my case, the rice and cheese sauce were still warm from having just been cooked, so it only took 5 minutes to heat the casserole through. If your rice or cheese don't start out warm, you'll need to allow more time to heat it up.
Cheese sauce (Cheddar/Fontal)
1 tbsp butter
1 tbsp flour
1 cup whole milk, cold
4 oz cheddar, shredded
4 oz fontal, shredded
Shred and blend the two cheeses so that they are evenly mixed and set aside.(1)
Heat a heavy saucepan on medium-high heat. Melt the butter in the pan. Once the bubbles have stopped, add the flour and stir. Continue stirring while the roux cooks for 4-5 minutes. Add the milk and continue stirring for another 5-10 minutes to thicken the bechamel. Do not let the milk start to boil, and keep stirring to prevent burning on the bottom. Once the sauce starts to thicken, remove from the heat and begin adding the cheese a little at a time. Allow each addition to melt and completely incorporate before adding the next. If the sauce cools too much, put back on medium heat for a bit, but take off the heat again before adding more cheese.
The second new technique I wanted to practice was "baked" rice. According to one site I read, cooking rice in the oven rather than the stovetop produces more predictable and better results. My theory is that the oven provides more even heating (rather than all the heat coming from the bottom of the pot). As a side bonus, the pot was easier to clean, too! I usually have at least a little rice stuck/burned on the bottom but not this time. And the rice was well cooked, just a little sticky, and full-flavored. For this batch, I added some onion and garlic, and next time I think I'll try putting some spices in as well.
Oven cooked rice
2 tbsp olive oil
2 cups white rice
3 cups water
1 cup onion, chopped
2 cloves garlic, smashed and chopped
Preheat oven to 350°
Heat an oven safe pot with a tight fitting lid over medium-high heat. Add the oil to the hot pot and turn the pot to coat the bottom. Add the rice and stir for 2-3 minutes to coat the rice in oil and toast lightly. Add the onion and garlic, then all the water. Once it comes to a boil, stir once then put the lid on the pot and put into the oven. Cook for 13 minutes, then remove the pot from the oven and set it aside for another 5 minutes before removing the lid. Fluff and serve.
As I said, this worked like a charm. The water was completely absorbed, the rice was perfect, and clean up was a breeze!
To go with my rice and cheese sauce, I decided to brown some ground beef and stir up a casserole.
Cheesy Beef and Rice Casserole
1/2 pound ground beef, with cumin and chili powder to taste
1/2 cup pureed black beans (2)
2 cups cooked rice
3/4 to 1 cup cheese sauce
1-2 oz shredded cheese for topping
Preheat oven to 350°.
Cook the ground beef and drain the fat. Stir the meat and rice together, then add the beans and cheese sauce and combine thoroughly. Place in an oven safe casserole dish or pot and top with the shredded cheese. Bake to heat through(3) then turn on the broiler for 3 minutes to get the top bubbly.
Yum! We were both pretty hungry, so Dorothy and I ate the whole dish between us for dinner. As part of a larger meal (or if we had eaten more at lunch) this might have been three servings.
________________________________________
(1) Mixing the cheeses evenly is key. According to Jeaneane (Cheesemonger extraordinaire), this is the way to make sure that the clumping qualities of the cheddar are properly diluted and get a smooth sauce.
(2) Last night was burrito night; for black bean burritos I drain a 15oz can of beans and run them through my food processor with a bit of chili powder and cumin. This is every bit as good as any "refried" beans I've ever had, and doesn't have the added fat of refritos .
(3) In my case, the rice and cheese sauce were still warm from having just been cooked, so it only took 5 minutes to heat the casserole through. If your rice or cheese don't start out warm, you'll need to allow more time to heat it up.
Tuesday, December 1, 2009
Soup is good food!
As I was driving home in the dark, dreary, cold rain, I pondered (as I am wont to do in such times) dinner. It occurred to me that this was such a day as my dear wife would enjoy soup. Soup! Just the thing to warm the body and the spirit! But what sort of soup? Again, my thoughts turned to my dear wife, who happens to be partial to potato soup in its various forms. And lo! There are potatoes in my pantry!
I consulted the Interwebz, and was provided with a number of recipes, this one using cream, this other milk, and still another calling for a white roux. The potatoes should be red, and boiled; no, they must be baked russets!
So with a staggering variety of options, I decided to blaze my own trail. The result was quite yummy, and well received by the aforementioned dear wife. Yay!
Potato Soup
4 large baking potatoes, peeled and cut into small cubes
1 cup onion, diced
2 cloves garlic, diced
water to cover
1/2 cup milk
8 oz cheddar cheese, shredded
salt and pepper to taste
3-4 strips of bacon. cooked and crumbled
Put the potatoes, onion, and garlic in a soup pot and cover with water. Add salt and pepper and bring to a boil, then turn down and simmer until the potatoes are soft (about 20 minutes). With the heat on low, add the milk and stir to begin breaking up the potato cubes. Add about half of the cheese a little at a time, stirring each addition until it is fully melted and incorporated. Serve in soup bowls topped with additional cheese and bacon.
YUM!
Monday, November 23, 2009
Did someone say "Dessert"?
I just spent three days in Gamer Geek heaven: BoardGameGeekCon, put on right here in DFW by the good folks at BoardGameGeek. This annual event always scores three of my vacation days, and while it is loads of fun, it also means three days where I don't really see my lovely wife and amazing child, as I come home after they are in bed and either sleep in until after they leave for work and school, or get my sorry butt out of bed and back into the fray early. Either way, they graciously allow me to be absent for a long weekend, for which I am quite grateful.
So grateful, in fact, that I made sure to make time on Sunday to bake for Dorothy's office "Dessert Buffet", with plenty left over to keep for the Big Feast coming up this week (at least, I hope they'll last that long ...). I made two items for her to take along: one family recipe for which I have become well known among my friends, and one I found at the awesome Buns In My Oven blog.
So grateful, in fact, that I made sure to make time on Sunday to bake for Dorothy's office "Dessert Buffet", with plenty left over to keep for the Big Feast coming up this week (at least, I hope they'll last that long ...). I made two items for her to take along: one family recipe for which I have become well known among my friends, and one I found at the awesome Buns In My Oven blog.
Tuesday, November 3, 2009
I'm strong to the finich, cuz I eats me spinach!
... but not that nasty, slimy stuff you get in a can. I suspect that eating that stuff is how Popeye's eye got that way.
No, the way to eat spinach is fresh, and combined with things to help the texture and provide a flavor contrast. Spanakopita is one favorite way, but I just learned a new one. Wil Wheaton made a comment about a spinach wrap from Trader Joe's and linked a recipe; this is my version of that:
No, the way to eat spinach is fresh, and combined with things to help the texture and provide a flavor contrast. Spanakopita is one favorite way, but I just learned a new one. Wil Wheaton made a comment about a spinach wrap from Trader Joe's and linked a recipe; this is my version of that:
Wednesday, October 21, 2009
Simple Elegance
Driving home from work, I was considering the various leftover options I had for dinner, and none of them really appealed to me. I mentally worked my way around the refrigerator, and noticed the buttermilk. Pancakes! But that's a big load of carbs; for dinner I want something to go with it ... how about eggs? But how ... scrambled? Over easy? Some sort of omelette?
Then it hit me ... let's step it up a bit, go for something a little more elegant than just "eggs and pancakes". So I give you, "Oeufs al'Antoine":
Buttermilk Pancakes
2 cups flour
2 tsp baking soda
1 tbsp baking powder
1 tsp salt
1 tbsp sugar
2 cups buttermilk
2 eggs, beaten
1 tbsp butter, melted
Stir the dry ingredients together in one bowl, and the wet in another. Pour the wet onto the dry and stir just enough to bring together. There will be lumps, but that's ok. As Alton always says, "Just walk away." Let the batter rest while your griddle warms up to 350°, then use a 1 oz disher to scoop batter out. Cook the first side until you see bubbles popping on top of the batter, and the edges start to dry. Flip once and cook the other side. Store in a cool oven on a plate or cookie sheet with a towel over the top while you finish cooking the whole batch.
 Once the pancakes are all cooked, heat a nonstick skillet with a tight fitting lid over medium to medium-high heat. Once the pan is hot, give it a light coating of butter or oil. Depending on the skillet size, crack one or two eggs, doing your best to center the yolks. Sprinkle a bit of salt and pepper on top of the eggs and cover with the lid. In about two minutes or so (depending on the heat) the tops of the eggs should be set. Slide an egg onto each pancake and top with fresh parmesan.
Bon appetit!
Sunday, October 18, 2009
Come on down to Tony's Diner!
We're cooking up burgers today! Not just any burgers, but good old fashioned roadhouse "sliders" on fresh baked potato rolls!
To start with, we need the rolls. Good bread takes time, but even so this recipe isn't all that intensive. Mostly it just needs time to rise:
1 pkg (1/4 oz) yeast
1 1/2 cup warm potato water(1)
1/3 cup butter, softened
1/4 cup sugar
1 tsp salt
1 cup potatoes, mashed(2)
4-5 cups all purpose flour
In the bowl of your stand mixer, proof the yeast in 1/2 cup of the potato water with 1 tbsp of the sugar. Once the yeast is foamy, add the remaining water, sugar, salt, and butter, and beat until well mixed. Add the potatoes and continue mixing for 2-3 minutes. Add the flour 1/2 cup at a time, allowing each addition to fully incorporate before adding the next. At around 3 or 3 1/2 cups, the dough will be thick enough to switch to a dough hook if you have one. Continue adding 1/2 cup of flour at a time until the dough is pulling away from the bowl. Depending on the humidity, this should be at about 4 or 4 1/2 cups.
Turn the dough out onto a lightly floured surface and knead by hand until you have a smooth, satiny dough. You may have to add up to another 1/2 cup of flour. Once it is smooth, form into a ball and place into a buttered bowl. Cover and refrigerate for at least 2 hours or up to 24 hours.(3)
When you are ready to continue, take the dough out and punch it down, then let it rest for 10 minutes. Prepare a 9 x 13 baking dish with baking spray or butter.
To prepare the rolls, place the dough onto a cutting board. Use a sharp knife to cut the dough into equal sized portions and arrange those portions into your baking dish.(4) Place in a warm place to rise until doubled in bulk.(5)
Bake at 400° for 16-20 minutes until golden brown.
Once these babies are in the oven, we start preparing the meat. We're doing regular hamburgers as well as grilled chicken, portioned out to fit nicely on the rolls.
Following Alton Brown's instructions from his "Man Food Show" episode, we roll a pound of ground chuck out nice and thin (using a sheet pan, or just eyeballing the size and shape). We sprinkle the top with kosher salt, fresh ground pepper, and onion and garlic powder, then fold the meat over longways, pat it together, and cut into eight squares with a pizza cutter. Finally we put them on a 350° griddle for 3-4 minutes on a side.
For the grilled chicken burgers, we take a split chicken breast and cut each side into three pieces. The thicker portions get flattened out a bit by folding a piece of waxed paper over each piece, then hitting them with a rolling pin a few times. With a bit of olive oil on the griddle we cook them like the burgers, 4 minutes on a side at 350°.
Each burger is served with a bit of your favorite sauce (mayo is mine), some grilled onions, and a slice of cheese. They're small but packed with flavor! Come on down and order yours now!
__________________
(1) This is the water you cooked the potatoes in. Since I do a lot of potato bread, I'll boil up five or six potatoes at a time, then portion both the potatoes and the water into baggies (1 cup of potato or water in each) and freeze them so I can get out just as much as I need at baking time.
(2) Don't add any salt or butter. This isn't a side dish, it's an ingredient.
(3) Potato bread is a wondrous thing. It does its first rise in the refrigerator, and you can let this go until the next day, allowing you to prep the dough the day before a big dinner. The next day you just get it out, let it warm up, and pop it in the oven.
(4) For the sliders, I went with 16 fairly large rolls by cutting the dough into halves four times. You could also do 24 more dinner-roll sized rolls by cutting the dough first into thirds, then cutting those into halves three more times.
(5) If you refrigerated for the minimum 2 hours, the second rise should take 40 minutes to an hour. If you refrigerate longer, the rise will take longer as the dough has to warm up, so allow enough time and watch the volume of the rolls. I find it helps to put the oven on "warm" (about 170°) for about 5-10 minutes to create a good rising spot. I cover the pan with a towel a spritz a tiny bit of water onto the towel to keep the top of the dough moist but not wet.
Sunday, October 11, 2009
Baketoberfest!
Yesterday I decided that it was time to do some baking. I got my shopping done, washed all the dishes, organized the tupperware, and straightened the kitchen. This morning I got up, emptied the dishwasher, lined up my various ingredients and tools, and started in.
First off I needed breakfast, and two overripe bananas beckoned to me ...
 Banana Bread
2 cups flour
1 tsp baking soda
1/2 tsp salt
1/2 cup butter
1 cup sugar
2 eggs, beaten
2 very ripe bananas
1/3 cup milk
1 tsp lemon juice
1/2 cup chopped pecans
Sift the flour, baking soda, and salt together. In another bowl, cream the butter with the sugar. Add the eggs and bananas and mix well. Combine the lemon juice with the milk (the milk may curdle a bit). Alternately add the flour mix and the milk to the main bowl starting and ending with the flour, stirring well after each addition. Stir in the nuts, then pour into a greased loaf pan. Bake at 350° for 1 hour, or until a toothpick comes out clean from the center of the loaf.
Besides the bananas, I had the remains of a pint of strawberries, two plums starting to shrivel up, and an apple. I skinned the apple and plums and diced all the fruit up into their own bowls. Each got 2-3 tablespoons of sugar and bit of flour (plus the apples got some cinnamon) and all got set aside to macerate. Yes indeed, later there will be fruit pies!
While the fruits gave up their juices, I prepared the filling for the meat pies. This is essentially a sloppy joe mix, with a little less liquid than you might use for sandwiches, since I was planning to bake it into pies.
Sloppy Joes
1 lb ground beef
1 medium onion, chopped
2 stalks celery, chopped
2 cloves garlic, minced
4 oz tomato paste mixed with 1/4 cup water
1/8 cup ketchup
1 tbsp cider vinegar
1 1/2 tsp Worcestershire sauce
1 tbsp sugar
1/8 tsp black pepper
Brown the meat in a heavy skillet. Add the onion, celery, and garlic and cook until the onions are clear. Add the remaining ingredients, stir well, and simmer for 5-10 minutes.
This mixture got set aside next to the bowls of fruit while I prepared the pie crust. At this point, my brain went in an odd direction, and I made not one, but two complete batches of the WRONG pie crust recipe ...
Pie Crust #1 (Great for large dish pies, not so good for pocket pies)
6 tbsp butter
2 tbsp shortening
6 oz flour
1/2 tsp salt
1/4 cup ice water (preferably in a spray bottle)
Cut the butter and shortening into small pieces and place in the freezer for about 5 minutes. Pulse the flour and salt in a food processor to mix and aerate. Add the butter and pulse 4-5 times to mix. Add the shortening and pulse another 4-5 times. Add water a tiny amount at a time to the processor and pulse 2-3 times after each addition. The best way to do this is by spritzing it from a spray bottle, which adds it as a mist rather than all together. Continue adding water and pulsing until the dough is just wet enough that it holds its shape when you squeeze a ball together into your fist. Once it reaches that point, give one more addition of water, then pour the mixture into a gallon sized zip top bag. Compress the flour mixture into a tight ball, then close the bag and refrigerate for 5 minutes to allow the flour to absorb the water.
Bring the bag out and open the top, but do not remove the ball. Press it flat in the center of the bag, and then use a rolling pin to roll it out. Once the dough is rolled out to the full size of the bag, use a knife or scissors to open the bag.
I rolled out the first batch of dough and started to cut rounds for the fruit pies ... then when I tried to fold the dough over to seal the pies I noticed it was too dry and flaky ... I managed to get a couple made, but it was clear something was wrong, though I hadn't yet figured out what. While I pondered that, I decided to make some cookies:
 Peanut Butter and Chocolate Chip Cookies with Oatmeal
1 cup (2 sticks) butter
1 cup brown sugar (firmly packed)
1 cup sugar
2 weggs
1 tsp vanilla
1 1/2 cups flour
1 tsp baking soda
1 tsp cinnamon
1/2 tsp salt
1 cup rolled oats
1 cup semi-sweet chocolate chips
1 cup peanut butter chips
Cream butter with both sugars. Add eggs and vanilla and mix well. Combine flour, baking soda, cinnamon, and salt in a food processor and pulse several times to mix and aerate. Add in small batches to the creamed butter mix and combine well after each addition. Once everything is well combined, stir in the oats, chocolate chips, and peanut butter chips. Use a spoon or a disher (3/4 oz for smaller cookies, 1 oz for larger ones) to drop dough onto a parchment lined cookie sheet. Bake for 10-13 minutes at 350°.
While baking the cookies, I finally realized that I had been using the wrong pie crust recipe. I found the correct one and made another two batches:
 Pie Crust #2 (Awesome for pocket pies)
10 oz flour (about 2 cups)
2 tsp baking powder
3/4 tsp salt
2 1/2 oz shortening
3/4 cup milk
1 egg beaten with 1 tsp water
Pulse the flour, baking powder, and salt in a food processor to mix and aerate. Transfer to a large mixing bowl. Add the shortening and mix with your hands to distribute the shortening through the flour until you get a crumbly texture. Add the milk all at once and stir with a spatula to bring it together. You may have to add a small amount of additional flour to get it dry enough to roll out.
Lightly flour the countertop and roll the dough thinly. The dough will be very springy, and will get more so the longer it rests and even more so when you gather scraps and re-roll for additional pies, so work quickly and carefully.
Cut the dough into disks with a cookie cutter. Spoon 1 to 2 tablespoons of your filling into the center of the disk, brush the edges with the beaten egg wash, and fold over. Use the tines of a fork to seal the edges, then dock the pie once or twice with the fork. Place on a parchment lined cookie sheet and bake for 25-30 minutes at 350°.
 Two batches of this gave me enough to make my meat pies and plum pies. For the meat pies, I used a 6 inch diameter disk which I filled with 3-4 spoonfuls of the Sloppy Joe mix and about 1 1/2 tablespoons of shredded cheddar. The plum pies went on 4 inch diameter disks, with 1-2 spoonfuls of plums and a little of the juice.
 I didn't have enough flour left for another batch of pocket pie dough, so I tried to get creative for the apple and strawberry. I rolled out a batch of the original pie crust and cut it into disks which I used to line the cups of a muffin tin. I spooned apple and strawberry filling into seperate cups and baked it along with the pies. Unfortunately, the dough didn't really firm up right ... it could be the humidity, might be the small amount of whole wheat flour I used along with the white flour, or maybe the oven temperature (the pie crust would normally have baked at 450°, but I didn't want to change the oven temperature while I was baking everything else). When I tried to remove the tarts from the muffin tins, the dough just disintegrated. So I just dumped it all into two bowls (one for the apple, one for the strawberry), stirred it up, and called it "crumble".
So that's it, Baketoberfest 2009. 6 hours, 3 dozen cookies, 1 dozen large meat pies, a half dozen plum pies, a loaf of banana bread, and a small batch each of strawberry and apple crumble. My feet hurt, but I had a good day. Now I just have to find someone willing to help us eat all of this ...

Monday, October 5, 2009
Eggsperimentation!
OK, yeah, I know. It's not even original. Sometimes you just go with the classics, though. :)
__________________
Several years ago, we had to work on a Saturday to do a major software upgrade; the installation and testing were going to take most of the day, so the head of IT kept us fed. For breakfast, in addition to the usual assortment of bagels, he had something the breakfast shop called "Breakfast Pizza". It turned out to be a buttery biscuit base with scrambled eggs and sausage toppings. Once I had made Alton Brown's biscuit recipe, the buttery taste made me think of that "pizza", so I decided to try to make one of my own. It wasn't quite what I was after, but it's a step in the right direction. I'll give you what I did, then below tell how I plan to change it next time out.

It turned out quite tasty, but the dough really rises a lot. Also, the egg cooked up more like a quiche than scrambled eggs (which I should have expected, really). Next time I think I'll only use half of the dough recipe in a 9x9 pan, then add the first bit of cheese and start the baking. While it's in the oven, I'll cook the eggs in a pan to get them mostly set as scrambled eggs. At about 8 minutes I'll pull the pan out, add the eggs and bacon (or maybe sausage), and return it to the oven to finish everything off. It'll take a bit of timing to do right, but I think it'll be worth it. I'll report back when I try it.
_______________
(1) I cooked the bacon in the oven (laid out on a cooling rack set over a cookie sheet to catch the drippings, oven set at 450°), so that it was already hot enough for the biscuits.
(2) This is easier said than done. The dough is too wet and sticky to roll out, but too thick to spread like a cake batter. Use a silicone spatula and be patient. It won't be smooth, but you can get a pretty even layer if you work at it.
__________________
Several years ago, we had to work on a Saturday to do a major software upgrade; the installation and testing were going to take most of the day, so the head of IT kept us fed. For breakfast, in addition to the usual assortment of bagels, he had something the breakfast shop called "Breakfast Pizza". It turned out to be a buttery biscuit base with scrambled eggs and sausage toppings. Once I had made Alton Brown's biscuit recipe, the buttery taste made me think of that "pizza", so I decided to try to make one of my own. It wasn't quite what I was after, but it's a step in the right direction. I'll give you what I did, then below tell how I plan to change it next time out.
1 recipe Alton Brown's biscuits
6-8 strips bacon
1 - 1.5c cheddar cheese, shredded
8 eggs
Cook the bacon, cut into pieces, and set aside. Preheat the oven to 450°. (1)
Prepare the biscuit recipe and spread it out in the bottom of a greased 9x13 baking dish(2). Top with 2/3 of the shredded cheddar and the bacon. Scramble the eggs and pour into the pan, then top with the remaining cheese. Bake for 12-15 minutes until the biscuit is cooked and the egg set.

_______________
(1) I cooked the bacon in the oven (laid out on a cooling rack set over a cookie sheet to catch the drippings, oven set at 450°), so that it was already hot enough for the biscuits.
(2) This is easier said than done. The dough is too wet and sticky to roll out, but too thick to spread like a cake batter. Use a silicone spatula and be patient. It won't be smooth, but you can get a pretty even layer if you work at it.
Tuesday, September 29, 2009
Brisket Tacos
No stories today, just a nice report of an improvised recipe. One of our many former housemates used to use green chilies to make a very flavorful but non-spicy stew. During my weekly "What should I cook this week?" conversation with Dorothy, she mentioned that. I decided to make a variation to use as taco/burrito filling, and it turned out quite nice. I did this on Sunday afternoon, when I could let it cook for a long time; with the right cut (and shape) of meat, you could do this in the slow cooker just as well.
Green chili brisket tacos
1.5lb flat cut brisket beef (1)
2-3 medium baking potatoes (or 5-6 new potatoes), diced into bite-sized pieces
1 medium onion, coarsely chopped
4-5 cloves garlic, bruised (2)
1 5oz can of diced green chilies
Vegetable or beef stock (about 1 cup depending on your dish)
Red wine (optional) (about 1/2 cup depending on your dish, or to taste)
Olive oil, salt, pepper
Corn or flour tortillas
Oaxaca cheese
Preheat oven to 325°.
Oil a baking dish large enough to hold the meat and vegetables. Salt and pepper the beef and place it in the center of the pan. Arrange the potatoes, onions, and garlic around the meat. Spoon the chilies across the top of the meat. Pour in enough of the stock and wine to come about halfway up the meat. Cover with aluminum foil or a lid, and cook for 2 hours. When the meat is cooked, remove it from the dish and shred it. Return to dish and mix well with the vegetables. Return to the oven for another 15-20 minutes to let the meat soak up the remainder of the liquid and blend the flavors. Serve on tortillas with oaxaca.
_______________________________
(1) I'll be honest here, I didn't pay close attention to the actual cut; I asked my butcher if he had anything good for brisket on sale, and just used what he gave me.
(2) I just set the flat of my big knife across the clove and give it a light hit. The idea isn't to smash it flat, just open it up and release some of the oils.
Sunday, September 20, 2009
Sometimes magic sounds like tape
I have quite a collection of pots, pans, bowls, and cooking utensils. Most of the time I only need a fraction of them, though I do find times to use each one, based on size and shape. I could do with fewer, I suppose. I could lose the smaller mixing bowls and just use the larger ones; I really only need a couple of spoons, or a single ladle. But every now and then, the stars misalign, and things don't go quite as planned. You have to press some extra equipment into duty to get the job done. Sometimes magic sounds like tape (around 4:45 here, in case you don't get the reference), and sometimes cooking sounds like muffled curses and extra pots and pans.
_____________
I have a number of cookbooks and websites I read not to actually cook the recipes, but just to kickstart my imagination. Left to my own devices, I'll slowly work myself into a rut of cooking the same two or three things every week; when I realize I'm doing it, I start reading my cookbooks and searching sites for ideas.
One of the books I have is of the "30 minute meals" variety. It features ways to use various frozen vegetables, canned soups and sauces, and premade biscuits(1). One of these was a chicken pot pie, using leftover chicken (from a presumed prior chicken meal), canned Cream of Chicken soup, a bag of frozen mixed vegetables, and a famous layered biscuit-in-a-tube to make the crust.
Since my purpose is to cook (for fun, health, and profit(2)), I decided to make my own pot pie. Starting at the top, I realized that the only choice for a crust was Alton Brown's amazing biscuits, which I so enjoyed when I made the fruit crostada. For the filling, I had to come up with meat, veggies, and sauce. Since I don't cook a whole chicken very often, and since Dorothy doesn't care for dark meat anyway, I decided to roast and shred a chicken breast. I went with a standard mix of vegetables: potato, celery, carrot, and garlic, with some green onion mixed in, just for fun. Instead of a cream-soup based sauce, I decided to instead do a roux thickened stock.
Thus, with plan in hand, I got to work. Things started out pretty well, but as I was free-wheeling it, I made some mistakes, and had to go into Emergency Management mode. Hence my thankfulness for the extra pots and bowls. Ready to start keeping score?
I started off really well. My timing was nearly perfect. My chicken breasts were frozen from an earlier purchase(3), so I thawed them in the microwave [small dish] then put them in the oven to roast [cookie sheet with aluminum foil]. While that was going I chopped the vegetables and set them aside [cutting board, medium mixing bowl]. Then I made a roux and added some chicken broth [medium heavy pot]. Once I got that to simmering, I added the vegetables to precook and to let the starch help thicken the sauce. About that time, the chicken got done cooking, so I took it out and shredded it, set the meat aside [baking dish], and turned the oven up to 450°.
After a while, the sauce seemed to stop getting any thicker. It wasn't quite where I had hoped it would be, but I decided to just bully on. I went to pour the veggies and sauce into the baking dish, and discovered that it was way more volume than I had intended, so I divided the mixture into two portions [baking dish #2]. Both dishes were still nearly full to the top, leaving little room for the biscuit topping; plus, I just wasn't happy with the consistency of the sauce: it was too thin and soupy. I decided to go back and try to fix it, so I strained the sauce out of the meat and vegetable mixer [colander, reuse mixing bowl from before] and returned it to the heat [reuse heavy pot from before]. This time I cranked the heat and let it boil. I put the meat and vegetables into baking dish #1, and without the thin sauce it actually fit exactly how I had expected it to. I packed it down just a bit, and waited for the sauce. Eventually it did come together, and I poured it over the meat and vegetables, just to the top.
While the sauce was thickening, I made the biscuit dough [food processor, mixing bowl #2 and #3 (because I had to mix the wet and dry separately)]. I knew I was going to have some trouble with it, as it's a very wet dough. Dorothy suggested basically cutting biscuits and laying them across the top(4) which sounded like a great idea. Unfortunately, the dough isn't really cuttable; I gave it a good try, but then couldn't effectively lift the dough roudns. In the end, I just ended up spooning it onto the top of the dish and making a layer that way. Into the oven (finally!) it went, and 15 minutes later, it was done.
Final score: cutting board, food processor, cookie sheet, dish for microwave; three mixing bowls; two baking dishes; colander; several wooden spoons; various knives, forks, and spoons. Next time I'll be able to reduce the overall damage, I think. Planning ahead I'll be able to make more efficient use of my equipment.
Despite the issues with the sauce, ultimately I ended up with a wonderful pot pie, and I'll definitely make this again. Next time, though, I'll know to precook the vegetables, then strain them immediately and finish thickening the sauce, and reduce the overall pot and utensil count.
_____________
(1) In fact, it is filled with very specific suggestions as to which of these to use. I suspect the publisher is related to a particular packaged foods distributor, though I haven't cared enough to actually research it.
(2) The profit is theoretical, in that cooking from fresh ingredients should be cheaper than precooked stuff. Whether that turns out to be true or not I haven't determined, but it's generally tastier and more fun.
(3) I had had plans to make chicken alfredo last week, but things happened, and I ended up having to freeze the chicken for later. Guess what? It's later!
(4) As Alton Brown himself actually did on Good Eats, though with a different (much drier) biscuit recipe.
_____________
I have a number of cookbooks and websites I read not to actually cook the recipes, but just to kickstart my imagination. Left to my own devices, I'll slowly work myself into a rut of cooking the same two or three things every week; when I realize I'm doing it, I start reading my cookbooks and searching sites for ideas.
One of the books I have is of the "30 minute meals" variety. It features ways to use various frozen vegetables, canned soups and sauces, and premade biscuits(1). One of these was a chicken pot pie, using leftover chicken (from a presumed prior chicken meal), canned Cream of Chicken soup, a bag of frozen mixed vegetables, and a famous layered biscuit-in-a-tube to make the crust.
Since my purpose is to cook (for fun, health, and profit(2)), I decided to make my own pot pie. Starting at the top, I realized that the only choice for a crust was Alton Brown's amazing biscuits, which I so enjoyed when I made the fruit crostada. For the filling, I had to come up with meat, veggies, and sauce. Since I don't cook a whole chicken very often, and since Dorothy doesn't care for dark meat anyway, I decided to roast and shred a chicken breast. I went with a standard mix of vegetables: potato, celery, carrot, and garlic, with some green onion mixed in, just for fun. Instead of a cream-soup based sauce, I decided to instead do a roux thickened stock.
Thus, with plan in hand, I got to work. Things started out pretty well, but as I was free-wheeling it, I made some mistakes, and had to go into Emergency Management mode. Hence my thankfulness for the extra pots and bowls. Ready to start keeping score?
I started off really well. My timing was nearly perfect. My chicken breasts were frozen from an earlier purchase(3), so I thawed them in the microwave [small dish] then put them in the oven to roast [cookie sheet with aluminum foil]. While that was going I chopped the vegetables and set them aside [cutting board, medium mixing bowl]. Then I made a roux and added some chicken broth [medium heavy pot]. Once I got that to simmering, I added the vegetables to precook and to let the starch help thicken the sauce. About that time, the chicken got done cooking, so I took it out and shredded it, set the meat aside [baking dish], and turned the oven up to 450°.
After a while, the sauce seemed to stop getting any thicker. It wasn't quite where I had hoped it would be, but I decided to just bully on. I went to pour the veggies and sauce into the baking dish, and discovered that it was way more volume than I had intended, so I divided the mixture into two portions [baking dish #2]. Both dishes were still nearly full to the top, leaving little room for the biscuit topping; plus, I just wasn't happy with the consistency of the sauce: it was too thin and soupy. I decided to go back and try to fix it, so I strained the sauce out of the meat and vegetable mixer [colander, reuse mixing bowl from before] and returned it to the heat [reuse heavy pot from before]. This time I cranked the heat and let it boil. I put the meat and vegetables into baking dish #1, and without the thin sauce it actually fit exactly how I had expected it to. I packed it down just a bit, and waited for the sauce. Eventually it did come together, and I poured it over the meat and vegetables, just to the top.
While the sauce was thickening, I made the biscuit dough [food processor, mixing bowl #2 and #3 (because I had to mix the wet and dry separately)]. I knew I was going to have some trouble with it, as it's a very wet dough. Dorothy suggested basically cutting biscuits and laying them across the top(4) which sounded like a great idea. Unfortunately, the dough isn't really cuttable; I gave it a good try, but then couldn't effectively lift the dough roudns. In the end, I just ended up spooning it onto the top of the dish and making a layer that way. Into the oven (finally!) it went, and 15 minutes later, it was done.
Final score: cutting board, food processor, cookie sheet, dish for microwave; three mixing bowls; two baking dishes; colander; several wooden spoons; various knives, forks, and spoons. Next time I'll be able to reduce the overall damage, I think. Planning ahead I'll be able to make more efficient use of my equipment.
Despite the issues with the sauce, ultimately I ended up with a wonderful pot pie, and I'll definitely make this again. Next time, though, I'll know to precook the vegetables, then strain them immediately and finish thickening the sauce, and reduce the overall pot and utensil count.
Chicken Pot Pie
1 whole split chicken breast
3 new potatoes, chopped small
2 carrots, chopped small
3 celery stalks, chopped small
1/2 bunch green onions, chopped
2-3 cloves garlic, crushed
2 tbsp butter
2 tbsp flour
1 quart chicken broth
1 recipe Alton Brown's biscuits
Bake the chicken breast in a 350° oven for 15-20 minutes, then shred and place in the bottom of a 9" baking dish. Once the chicken is out, turn the oven up to 450°.
While the chicken cooks, make a roux from the flour and butter in a heavy pot, then add the broth. Bring to a boil and add the potatoes, carrots, celery, green onions, and garlic. Cook for 5-10 minutes until the potatoes have softened. Strain the vegetables out and stir into the chicken. Return the broth to a full boil and reduce. When the sauce is thickened sufficiently, pour over the meat and vegetables.
Prepare the biscuit dough and spoon into a layer on top of the meat and vegetables. (It is going to rise quite a bit, so don't make it too thick unless you want a LOT of bread with your meal. Use the leftover dough to make a crostata or just some extra biscuits for tomorrow's breakfast. Yum!) Bake for 15 minutes, then let cool before serving.
_____________
(1) In fact, it is filled with very specific suggestions as to which of these to use. I suspect the publisher is related to a particular packaged foods distributor, though I haven't cared enough to actually research it.
(2) The profit is theoretical, in that cooking from fresh ingredients should be cheaper than precooked stuff. Whether that turns out to be true or not I haven't determined, but it's generally tastier and more fun.
(3) I had had plans to make chicken alfredo last week, but things happened, and I ended up having to freeze the chicken for later. Guess what? It's later!
(4) As Alton Brown himself actually did on Good Eats, though with a different (much drier) biscuit recipe.
Monday, September 14, 2009
A beer is a just a beer, but a stout is more like a meal!
Yesterday (with some trepidation) I chilled and tasted the stout that I recently made. Part of the trepidation is the "recently" part -- the recipe I followed calls for a single ferment stage of two weeks, and then two weeks bottle conditioning. I really doubted that a stout would come out with such a short rack. The other part of the trepidation was that when I took the specific gravity reading at bottling time, I ended up with a net expected alcohol content of only 3%. If true, what I ended up with was definitely not going to be "stout". But I bullied on, bottled it up, and let it sit.
When I opened the bottle, I was greeted with a good stout aroma, which gave me hope. I poured it into a pint glass and LO! A lovely stout head formed, and stuck around for a pretty good time for a non-nitrogen pour. My heart lifted as I took a sip -- and was rewarded with a lovely flavor. Feeling much better about it, I sat down to enjoy the glass. By the end, I decided that I must have made a mistake on one of the readings, because there was definitely more than 3% alcohol in that glass. Joy!
 The recipe is "Ms Bessy's Moo-Moo Milk Stout" from The Brewmaster's Bible, a marvelous book with a load of information for the aspiring brewer and a ton of beer recipes for every style of beer. The name is an intentionally silly reference to the addition of lactose to the brew to give it a creamy mouth feel. I think it also does a nice job of arresting some of the sharp roastiness (that coffee-like flavor) of many stouts. The only variation I made to the recipe was because I couldn't get unhopped dark malt extract, so I used hopped extract and reduced the additional hops down to 1 oz.
So now my beverage fridge is filled with the brown ale from last month plus this stout. In another two weeks there will be a new batch of cider to chill as well. It's going to get a bit crowded in there!
When I opened the bottle, I was greeted with a good stout aroma, which gave me hope. I poured it into a pint glass and LO! A lovely stout head formed, and stuck around for a pretty good time for a non-nitrogen pour. My heart lifted as I took a sip -- and was rewarded with a lovely flavor. Feeling much better about it, I sat down to enjoy the glass. By the end, I decided that I must have made a mistake on one of the readings, because there was definitely more than 3% alcohol in that glass. Joy!
So now my beverage fridge is filled with the brown ale from last month plus this stout. In another two weeks there will be a new batch of cider to chill as well. It's going to get a bit crowded in there!
Saturday, September 12, 2009
Baking Day! Whole Wheat and Molasses loaf and Fruit Crostata
Today I decided to try out an idea I found on The Kitchn for a biscuit crostata. They basically say "use your favorite biscuit recipe, then top with thinly sliced fruit." They used peaches, but since Dorothy doesn't like peach, I decided to go with apples. Dorothy also suggested strawberry and kiwi, which sounded pretty nice as well. So off I went to the farmer's market for a load of fruit, and when I came home I started in.
For a biscuit recipe, I turned to Alton Brown's I'm Just Here for More Food, the companion to his earlier I'm Just Here for the Food.(1) In More Food, he breaks down baking into several "methods", including the Biscuit Method, the Creaming Method. and the Muffin method (among others). He explains the science behind what is happening, and why there are different techniques for different types of baked goods. After making this biscuit recipe, I don't know that I can ever make another. It's freakin' messy as a dough, and cutting it to make individual biscuits would be tricky, but even just making a sheet biscuit and cutting it yields an amazing result.

4 tbps (1/2 stick) unsalted butter, frozen
1 cup buttermilk (2)
Sliced fruit (see below)
Preheat oven to 450°.
Mix the dry ingredients together well (pulsing in a food processor does this very well and very quickly). Use a box grater to grate the frozen butter, yielding butter shavings. Put the butter into the flour mixture and toss to spread around and coat the butter with flour. Then use your fingertips to rub the butter and flour together until about half of the butter has disappeared into the flour. Put the bowl in the freezer.
Mix the wet ingredients together and beat well. Bring the bowl of flour back and pour the liquid in. Use a rubber or silicon spatula to mix it all together. When you are done you will have a very wet, sticky dough that is closer to a batter than what you usually think of as biscuit dough.
Lay out a 18-20 inch piece of waxed paper on the counter and dust it lightly with flour. Pour the batter into the center, and use the ends to fold the dough on top of itself. (The paper will protect your hands from getting the dough all stuck to them. Club hand is not your friend!) This is a somewhat messy process, and you'll need to watch that the dough doesn't escape out the top or bottom edge of the waxed paper. Give it about three or four folds from each side to get it "kneaded" and well mixed.
Now we have to get it onto the sheet pan(3). Since I wasn't cutting out biscuits that could be individually put onto the tray, I had to get creative. After a couple of false starts, I found a trick that worked: Get the dough spread out so that it is about 1/2 inch thick (don't worry about getting it uniform, it's not going to happen. Just estimate.) Dust the top with flour, then lay out a piece of parchment paper(4) on top of it. Carefully slide a cutting board underneath your waxed paper, then lay your sheet pan face down on top. Now flip! Peel back the waxed paper (yes, a fair amount of dough will be lost to the waxed paper. Sad, but true.) and you have a somewhat rectangular mass of biscuit dough ready to go.
For the topping you want fruit with some substance and strong flavor, sliced fairly thin. For the apple crostata quarter a medium to large Gala apple, slice the core off each quarter, peel them, then shave off very thin slices. Lay out to cover the biscuit and dust with a sprinkling (less than a tablespoon) of brown sugar and top with cinnamon. For the kiwi-strawberry crostata, peel and slice three kiwis and about slice about 8 strawberries (depending on size). Lay out to cover, alternating fruits, and dust with sugar.
Bake for 15 minutes. Allow a few minutes to cool, then enjoy.
 I also figured that as long as I was heating the oven up to 450°, I should take advantage of it and bake a loaf of a new favorite whole wheat bread I gleaned from James Beard's Beard on Bread. Pretty much any loaf I bake either comes directly from Beard or is based on one of his recipes. (One potato bread recipe has become a favorite of my family and neighbors, and I spend a week baking loaves to give as gifts.) This wheat loaf is amazingly simple, only requires a single rise, and happens to bake at 450°, meaning I could prep the loaf and let it rise while I made the crostatas, then just pop it right in the oven when the second crostata came out without having to let the temperature adjust. It is also pretty unique in being made entirely from whole wheat, rather than a blend of whole wheat with all-purpose flour.
3 1/2 tsp yeast (1 1/2 packets)
This bread has a great texture and lots of flavor. It is great as a dinner bread or for sandwiches.
____________________
(1) I really can't recommend both of these books enough. If I had to pare down to just five cooking related books, Brown's books would be two of them. They don't just list recipes, they teach you how to cook and why you do it that way.
(2) Brown strongly recommends using full-fat buttermilk and yogurt; however, when I went shopping I could only get lowfat or non-fat. I used the lowfat of both, and got great results.
(3) Technically, I'm using a quarter-sheet pan. If your oven holds a full sheet pan, I wanna come use your kitchen some time!
(4) Not waxed paper! Parchment paper is made with silicon, which is oven safe and won't stick to your dough. Waxed paper will melt and leave wax on your bread. Nasty!
(5) My oven has a "Keep Warm" setting that holds at about 170°. If you don't have this, turn your oven to its lowest setting and leave on for just a few minutes to warm up, then turn it off for this step.
For a biscuit recipe, I turned to Alton Brown's I'm Just Here for More Food, the companion to his earlier I'm Just Here for the Food.(1) In More Food, he breaks down baking into several "methods", including the Biscuit Method, the Creaming Method. and the Muffin method (among others). He explains the science behind what is happening, and why there are different techniques for different types of baked goods. After making this biscuit recipe, I don't know that I can ever make another. It's freakin' messy as a dough, and cutting it to make individual biscuits would be tricky, but even just making a sheet biscuit and cutting it yields an amazing result.
Fruit Crostata on Alton Brown's amazing biscuits
2 cups all purpose flour
4 tsp baking powder
1/2 tsp baking soda
1 tsp salt
4 tbps (1/2 stick) unsalted butter, frozen
1 cup buttermilk (2)
1/3 cup plain yogurt (2)
1 egg
Sliced fruit (see below)
Sugar for dusting
Preheat oven to 450°.
Mix the dry ingredients together well (pulsing in a food processor does this very well and very quickly). Use a box grater to grate the frozen butter, yielding butter shavings. Put the butter into the flour mixture and toss to spread around and coat the butter with flour. Then use your fingertips to rub the butter and flour together until about half of the butter has disappeared into the flour. Put the bowl in the freezer.
Mix the wet ingredients together and beat well. Bring the bowl of flour back and pour the liquid in. Use a rubber or silicon spatula to mix it all together. When you are done you will have a very wet, sticky dough that is closer to a batter than what you usually think of as biscuit dough.
Lay out a 18-20 inch piece of waxed paper on the counter and dust it lightly with flour. Pour the batter into the center, and use the ends to fold the dough on top of itself. (The paper will protect your hands from getting the dough all stuck to them. Club hand is not your friend!) This is a somewhat messy process, and you'll need to watch that the dough doesn't escape out the top or bottom edge of the waxed paper. Give it about three or four folds from each side to get it "kneaded" and well mixed.
Now we have to get it onto the sheet pan(3). Since I wasn't cutting out biscuits that could be individually put onto the tray, I had to get creative. After a couple of false starts, I found a trick that worked: Get the dough spread out so that it is about 1/2 inch thick (don't worry about getting it uniform, it's not going to happen. Just estimate.) Dust the top with flour, then lay out a piece of parchment paper(4) on top of it. Carefully slide a cutting board underneath your waxed paper, then lay your sheet pan face down on top. Now flip! Peel back the waxed paper (yes, a fair amount of dough will be lost to the waxed paper. Sad, but true.) and you have a somewhat rectangular mass of biscuit dough ready to go.
For the topping you want fruit with some substance and strong flavor, sliced fairly thin. For the apple crostata quarter a medium to large Gala apple, slice the core off each quarter, peel them, then shave off very thin slices. Lay out to cover the biscuit and dust with a sprinkling (less than a tablespoon) of brown sugar and top with cinnamon. For the kiwi-strawberry crostata, peel and slice three kiwis and about slice about 8 strawberries (depending on size). Lay out to cover, alternating fruits, and dust with sugar.
Bake for 15 minutes. Allow a few minutes to cool, then enjoy.
Fast Whole Wheat and Molasses bread
3 1/2 c whole wheat flour
1/4 c oat bran
1 tbsp salt
3 1/2 tsp yeast (1 1/2 packets)
2 tbsp molasses
2 cups warm water
Mix the flour, bran, and salt in a bowl and place in a cool oven(5) to warm up. Stir the molasses into 1/2 cup of the water and add the yeast to proof. Once the yeast is ready, pour into the bowl with the flour and add the remainder of the water. Stir to combine into a very wet, sticky dough.
Turn the oven up to 450° to preheat.
Prepare a loaf pan with butter or non-stick spray, and put the dough in. Set somewhere warm to rise (should take an hour or two). Once the bread has doubled in bulk, put into the oven and bake for 45-50 minutes.
This bread has a great texture and lots of flavor. It is great as a dinner bread or for sandwiches.
____________________
(1) I really can't recommend both of these books enough. If I had to pare down to just five cooking related books, Brown's books would be two of them. They don't just list recipes, they teach you how to cook and why you do it that way.
(2) Brown strongly recommends using full-fat buttermilk and yogurt; however, when I went shopping I could only get lowfat or non-fat. I used the lowfat of both, and got great results.
(3) Technically, I'm using a quarter-sheet pan. If your oven holds a full sheet pan, I wanna come use your kitchen some time!
(4) Not waxed paper! Parchment paper is made with silicon, which is oven safe and won't stick to your dough. Waxed paper will melt and leave wax on your bread. Nasty!
(5) My oven has a "Keep Warm" setting that holds at about 170°. If you don't have this, turn your oven to its lowest setting and leave on for just a few minutes to warm up, then turn it off for this step.
Monday, September 7, 2009
Time for some curry
The thing I really love about this cookbook is the organization. Indian cooking often involves spices and ingredients being added with only a couple of minutes of cook time between additions, so mise en place is critical. This book actually lists the ingredients in the sidebar of the page listed as "Bowl 1", Bowl 2", etc., so that in the recipe itself a step can simply say "Now add bowl 2 and stir for 2 minutes." This lets you not have to think about which things go together when you're in the middle of it, and has the advantage (for me at least) of letting me do the prep, then clean everything while the pan is heating, so that only the bowls and pots have to cleaned afterward.
Delhi Chicken Curry (Delhi Murgh Tarkari)
10-12 pieces of chicken, either all thighs or half thighs, half drumsticks
1 1/4 cup chicken stock
Bowl 1: 1 large onion (sliced), 2 cloves garlic (crushed)
Bowl 2: 4 cloves, 4 cardamom pods, 1 one inch cinnamon stick, 2 two inch pieces of ginger (peeled and sliced)
Bowl 3: 1 tsp chili powder, 2 tsp coriander, 1/2 tsp turmeric, 2 tsp cumin
Bowl 4: juice of two lemons, 4 tbsp tomato paste
Bowl 5: 1 tbsp chopped cilantro leaves, 2 tsp salt, 1 tsp ground black pepper
In a heavy pan, sear the chicken in about 4 tbsp vegetable oil then set aside. Using the same oil, cook Bowl 1 for 5 minutes or until the onions are nicely carmelized. Add Bowl 2 and cook for 2-4 minutes. Add Bowl 3 and cook for 2 minutes stirring continuously to prevent the spices from burning onto the pan. Add Bowl 4 and stir well to make a sauce, then add the chicken back and stir to coat. Add chicken stock and bring to a boil. Simmer gently for 35-50 minutes, until the chicken is tender. Stir in Bowl 5 and mix well, and let sit for 1-2 minutes to blend flavors.
Spiced Pullao Rice (Mushallar Pullao)
1 medium onion, thinly sliced
2 1/4 cup rice
1 tsp salt
Bowl 1: 1 clove garlic (thinly sliced), 10 cloves, 10 cardamom pods, 3 one inch cinnamon sticks
Bowl 2: 2/3 cup golden raisins, 1/3 cup slivered almonds
Cook the onion in vegetable oil until soft and starting to turn golden. Add Bowl 1 and cook gently for 1-2 minutes. Add the rice and mix well so that the rice is well coated with oil and spices. Add the salt and enough water to cover. Bring to a boil and simmer covered for 15-20 minutes until the water is absorbed. In a small pan cook Bowl 2 in 2 tbsp oil for 1-2 minutes, then stir into the rice.
This was the first actual curry I've ever made, and I'm impressed at how well it came out. My only complaint is that I thought it was pretty mild. On the other hand, Dorothy thought it was pretty much perfect, while (as I expected) Alex found it too spicy for her 12 year old palate. I may up the ginger and maybe the chili just a touch next time. Also, Dorothy doesn't really care for the texture of dark meat, so next time I may try using strips of breast meat instead.
The rice had a lovely sweet and crunchy texture from the raisins and almonds, and the onion was so well combined I actually forgot it was in there. I initially served the rice and the curry separately, worried that the sweetness of the raisins wouldn't go well with the curry. Turns out it worked really well, and we ended up just combining the rice and curry together into one dish.
___________________
(1) We discovered zattar at a Palestinian restaurant and have since discovered our local arabic restaurant/grocery serves it and sells it. We put it on pita or naan with olive oil and feta or mozzarella and heat it in the toaster oven. Yumm!
(2) And if you happen to be one of those former housemates and wish to lay claim to this book, feel free to contact me to discuss ransom terms.
Monday, August 31, 2009
Experimental Casserole: Southwestern Shepherd's Pie
I often get ideas for dinners by scanning the recipe books I've collected over the years. I usually end up not making what is actually in the recipe that catches my eye, but something based on it. The recipe in the book called for making the meat mixture and putting cornmeal breadsticks in decorative spokes. I didn't have cornmeal breadsticks, so instead I just made cornbread and baked on top. I'm sure it's been done many times before, but it's new to me. ;-)
1 cup flour
It ended up pretty good, though I realized after I was done that I should have added some cheddar cheese, either directly in the cornbread mix or between the meat mixture and the cornbread. I also need to up my spices(1) next time, but overall we enjoyed it.
I intended to take a picture of the final result, which actually looked quite nice when it came out of the oven. Unfortunately my proclivity for cleaning the kitchen right away kicked in, and I didn't think about it again until I sat down to write this up. Next time!
_____________
(1) The "to taste" in the recipe is a result of me just doing my usual "that looks right"; unfortunately I didn't account for the cornbread being such a strong sweet flavor and covering up the spices quite a bit.
1/2 large onion
1 or 2 cloves garlic
1 lb ground beef
15oz can kidney beans
15oz can diced tomatoes
8oz can corn
4oz can green chilies
chili and cumin to taste
Preheat oven to 425°.
In an oven proof frying pan, sautee the onions and garlic then brown the meat. When the meat is cooked, add the remaining ingredients and simmer to reduce out the liquid while preparing the cornbread.
1 cup flour
1 cup cornmeal
4 tsp baking powder
2 tbsp sugar
1 cup milk
1/4 cup vegetable oil1 egg
Mix the dry ingredients well then stir in the liquids to form a batter. Spread the batter across the top of the mixture in the frying pan and bake for 20-25 minutes, until the cornbread is set and lightly browned.
It ended up pretty good, though I realized after I was done that I should have added some cheddar cheese, either directly in the cornbread mix or between the meat mixture and the cornbread. I also need to up my spices(1) next time, but overall we enjoyed it.
I intended to take a picture of the final result, which actually looked quite nice when it came out of the oven. Unfortunately my proclivity for cleaning the kitchen right away kicked in, and I didn't think about it again until I sat down to write this up. Next time!
_____________
(1) The "to taste" in the recipe is a result of me just doing my usual "that looks right"; unfortunately I didn't account for the cornbread being such a strong sweet flavor and covering up the spices quite a bit.
Sunday, August 30, 2009
Adventures in Brewing - Hard Apple Cider
My first attempt at a hard apple cider was actually a surprising success; the only issue I had with it was that it ended up a bit drier than I would have preferred. We're about out of that batch, so today I set up a new batch with a couple of changes -- one intentional and the other not. The intentional change was to add 4oz of lactose, which is a non-fermenting sugar used in porters and stouts to add residual sweetness. The unintentional change was in the juice: before I had three gallons of unfiltered apple cider. This time of year it's harder to get that, so instead I used half filtered apple juice (not from concentrate) and half unfiltered natural apple juice (partially from concentrate). We'll see how it turns out.
In two weeks I'll bottle it, and in another couple of weeks we'll see how it turned out, and report back!
1.5 gallons filtered apple juice
1.5 gallons unfiltered apple juice
1.5 c sugar
1.5 c light brown sugar
4 oz lactose
1 11g packet Nottingham brewing yeast, started in 1c water for 15 min
1.5 gallons unfiltered apple juice
1.5 c sugar
1.5 c light brown sugar
4 oz lactose
1 11g packet Nottingham brewing yeast, started in 1c water for 15 min
Dissolv the sugars in 1/2 gallon of juice and bring to a boil, then pour into the rest of the juice. When it cools, add the yeast and seal it up to ferment.
In two weeks I'll bottle it, and in another couple of weeks we'll see how it turned out, and report back!
Tuesday, August 25, 2009
Spicy + Sweet = Yumm!
My daughter absolutely loves chicken with Shake n Bake Honey Mustard glaze. For her first day of Junior High, I wanted to make her one of her favorite dinners, so when I went shopping, I went to the spot with all the Shake n Bake stuff, and ... it wasn't there. So when we went shopping for school supplies at Target, I checked the grocery section, and ... it wasn't there either.
At this point, my brain kicks in. Honey mustard glaze. Clearly, this is going to consist of honey and mustard in some proportion, and probably some other spices and such. I can do this. I just have to get an idea of what the proportion should be, and what the "other spices and such" are. To the InterTubes!
After consulting literally hundreds(1) of sites, I came to the conclusion that there really don't need to be any "other spices and such", and the proportion appears to be somewhere between 1:1 and 2:1 in favor of honey. Consensus appeared to be to use Dijon or spicy mustard, though one maverick was using plain yellow mustard. Now I can be as mavericky as the next guy, and yellow mustard does have its place(2), but I decided I'd stick with the majority.
So I heated about 1/4 cup honey in a pyrex measuring cup, then added a few squirts of mustard. After a few stirs, I tasted, and it seemed about right. Alex agreed, so I gave the chicken a soak while I preheated the oven, then baked it up.
Result: Honey mustard chicken! (I know, it's a shock!) Put some green beans on the side, and call it dinner.
______________________
(1) OK, about a half-dozen or so.
(2) Its place is on the door shelf in the fridge, where guests who have no functioning taste buds can use it on their sandwiches or hot dogs, saving the real stuff for the rest of us.
Sunday, August 23, 2009
FC Dallas: FAIL. Trinity Hall: WIN. Dinner: Get it yourself.
There were several good moments in today's FC Dallas v Red Bull New York game, but not quite enough. Fortunately the crowd at Trinity Hall was lively and fun as always, so even with a bad game it was a good afternoon. After three Old Chub Scottish Ales I really shouldn't use anything hot or sharp, so no cooking tonight. Tomorrow there will be something of Alex's choosing to commemorate her first day of junior high school.
Saturday, August 22, 2009
Pastitsio
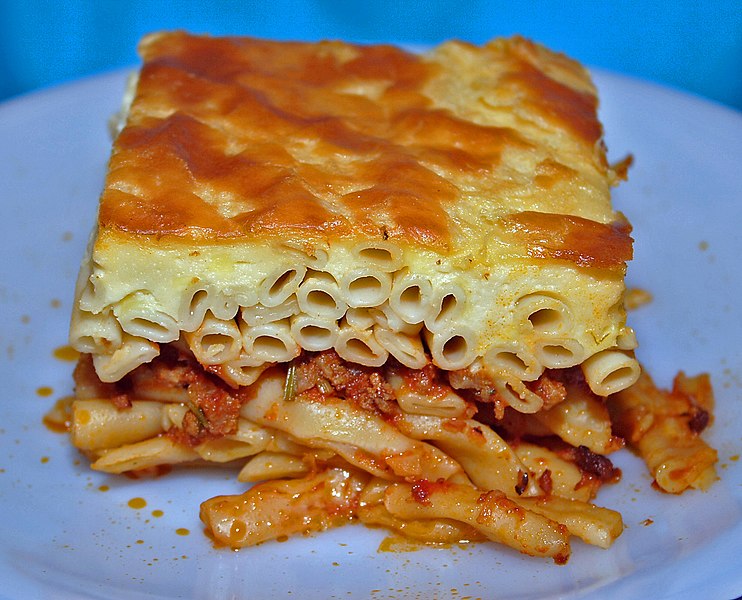
Meat Sauce
1 medium onion
2 cloves garlic
2 tbsp butter for sauteeing
1 1/4 lb ground beef or lamb
1 16oz can diced tomatoes
1/2 cup tomato sauce
2 tbsp butter for sauce
2 tbsp butter for sauce
salt and pepper
cinnamon
Sautee the onions and garlic until just starting to turn golden brown. Add the meat and brown. Add the tomatoes, additional butter, and spices and simmer for 15 minutes, allowing most of the liquid to reduce, leaving a hearty meat sauce.
Noodles
3/4 to 1 lb of pastitsio noodles. If you can't get them, ziti will do. (2)
3 eggs
1/2 cup grated parmesan
Cook the noodles for 5-7 minutes. Beat the eggs and cheese together, and toss the noodles in the mixture.
Bechamel
6 tbsp butter
6 tbsp flour
1 1/2 cups warm milk
3 eggs
pinch of salt
pinch of nutmeg
Melt the butter in a medium saucepan. When the bubbling stops, add the flour and stir together to make a roux. Add in the milk a little at a time and let the sauce come together. Temper the sauce into the egg then stir the egg in and add the salt and nutmeg.
Put it all together
Put half the noodles into the bottom of a 9x12 inch baking dish. If you are using real pastitsio noodles, lay them out parallel (think of it like a lasagna -- the extra effort is worth it). Layer the meat sauce onto the noodles, then the rest of the noodles on top. Pour the bechamel over the whole thing. Bake at 350° for 15 minutes. When it comes out of the oven, give it 10-15 minutes to cool a bit and to let the bechamel set up. Slice and serve.
Jeff Smith says this serves 6-8. The bechamel makes it really rich; I cut it into 12 squares. Based on the ingredients, I estimate about 450 calories per square. Put that with a salad and you have a pretty decent meal. (3)
It turned out really well -- Dorothy even called it "awesome". Next time I'll probably scale up the meat sauce to match the noodles, or maybe do a smaller batch in a 9x9 inch pan for fewer leftovers. I'm freezing about 1/2 of the squares, so I'll report back on how well it revives as leftovers.
_____________
Footnotes:
(1) I cut some butter out of the meat sauce (though there's still quite a bit), only used about half the egg wash for the noodles (I can't imagine how he made use of all of it), and used more noodles (because I hate having 1/4 of a package sitting around). Should have scaled up the meat sauce to match the noodles, though the bechamel was probably adequate.
(2) Try to avoid elbow macaroni if you can, but if you can't, just don't tell me.
(3) Of course, as it happens I didn't remember to make a salad, so I ended up having 2 squares. Fortunately, I had eaten light the rest of the day, so my diet isn't horribly blown.
Yet another blog!
All the cool kids are doing it, right? I did LJ for a while, when LJ was where all the cool kids were. I didn't really have that much to say, though, so I just sort of abandoned it. When I heard about "Julie and Julia", I thought that was a pretty neat idea. So like any good 21st century geek, I decided to steal it. ;-)
I'm not going to blog my way through a cookbook, though. That would just be stealing -- and it would require me to pick a cookbook and make everything in it. I know myself well enough to know I'm not going to do that for very long. So instead I'm going to just blog about what I'm cooking (and baking and brewing), share my recipes and thoughts, and maybe get some folks to share some of theirs. Being mildly ADD (as most geeks are, if you get right down to it), I'll most likely also talk about things other than cooking. I'm sure you can deal with it.
Comments are open, even anonymous, but if you do comment it would be nice to know who you are. Hopefully Blogger's anti-spam systems will work well enough that I won't have to worry about moderation.